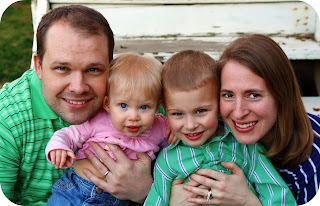
Peyton's First Birthday Party was beautiful and everything I had envisioned for our little girl. Our house was full of wonderful women who mean a lot to me and to our little girl. The handmade decorations were up, the cake was made and the weather was beautiful outside. Again, it was a wonderful day. Before I continue, I want to send a special thanks to the great grandma's who came in from out of town for the special occasion. Thank you for making the time and effort to celebrate Peyton. Now, on to the party. Here are a few photos I took with my Phone. I had 2 special friends take pictures and will post some of their pictures later. For now, enjoy these wonderful images of the birthday girl.
First, her cake.
Here is a look at Peyton starting to eat her cake. She didn't have any desire to smash the cake with her hands or in her face. She simply took her fingers, picked up the icing and tasted the yummy butter cream frosting.
Here we have a picture of Peyton and her buddy, Cora. Cora is 15 days older. I pray that they will become very good friends.
Here is a picture of Peyton with some more cake...a cupcake seemed to work better than a huge cake. She enjoyed her yummy treat.
.JPG)
She is looking a bit tired in this picture.
These were the party favors at the party. Since Peyton's birthday is on St. Patrick's day I made sure to have plenty of green on hand as well as a pot of gold at the end of the rainbow :)
Here is a picture of the birthday girl with Mommy, Grammie, Grossi (German for Great Grandma), and Grandma (Great Grandma). Thank you for celebrating with us.
Finally, here is the Birthday banner I made.
To make the banner, here are some simple directions.
First, I went to Hobby Lobby. I picked out 4 different scrapbook paper colors. 3 background colors and 1 for the letters. I bought 3 pieces of each color for a total of 12 pages. I cut the banner pieces to be 7 inches at the top and then 7 inches down from the center. I cut them out. I then had the privileged of using a special machine at Church to cut the letters. This took about 15 minutes. If I had to, I would have traced the letters and cut them out by hand. I then taped the letters on the flags.
Here comes the fun part. I simply took a needle and thread and did some simple sewing. I would sew into the banner on the left, run the strong along the top and sew out of the banner at the right. I did this till each flag was hung and viola - banner complete. I hope this project helps inspire other moms and dads to be creative for their child's birthday party. Oh yes, total cost of the banner was about $6.00.
.JPG)
.JPG)

.JPG)
.JPG)
.JPG)
.JPG)


.JPG)
.JPG)
.JPG)
.JPG)
.JPG)
.JPG)
.JPG)
.JPG)
.JPG)
.JPG)
.JPG)

.JPG)
.JPG)
.JPG)
.JPG)
.JPG)
.JPG)


.JPG)
.JPG)
.JPG)
.JPG)
.JPG)
.JPG)
.JPG)
.JPG)
.JPG)
.JPG)
.JPG)
.JPG)
.JPG)